Topology describes the way interrelated features are organized and connected. In ArcGIS Pro, it is implemented as a collection of spatial rules that are used to constrain active edits or audit and maintain the correctness of features based on their position relative to other features.
There are two types of topology from which to choose: topological editing and geodatabase topology. Using one or both can help you manage and maintain the accuracy of your feature data with respect to coincidence, adjacency, containment, and connectivity.
Topological editing
Topological editing is an editing mode that constrains coincident geometry to an ordered graph of topologically connected edges and nodes. It requires no setup and operates only on visible features that are editable.
Located on the Edit tab in the Manage Edits group, you can turn topological editing on and off as you modify features. Map Topology  operates on all features. Choosing a geodatabase topology rule limits topological editing to features participating in the selected rule.
Turning on topological editing makes the graph available to editing tools and shows an Edges tab on tools that can perform both feature and topological edits. Editing an edge or a node modifies the corresponding feature geometry; for example, moving a shared edge also stretches any connected segments.
The connectedness of your changes is validated when you Finish your edits. If they break the topological graph, the message Edit operation failed  appears and your changes are canceled.
For a list of editing tools that can edit topological elements, see Modify Features tool reference.

The topology graph
The topology graph uses nodes to impose connectivity constraints across endpoints and intersections. It uses edges to prevent gaps between shared polygon edges. How nodes and edges correspond to feature geometry is summarized in the following table.
| Simple feature | Topology element |
|---|---|
Point |
|
Polyline or polygon |
|
The cluster tolerance
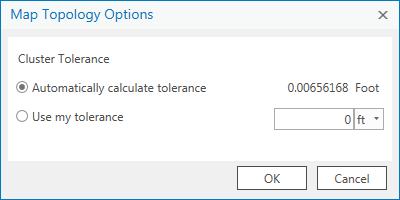
The cluster tolerance is the distance within which edges or vertices are determined to be coincident. By default, the minimum possible cluster tolerance is automatically calculated for you. Using this tolerance is generally the best practice.
To customize the cluster tolerance, click Map Topology Options.

Caution:
Increasing the cluster tolerance can reduce the spatial accuracy of your data and cause features to collapse or distort. This occurs when feature elements are incorrectly determined to be coincident and snap together.
Geodatabase topology
Geodatabase topology comprises a stepwise methodology that includes creating a topology for a dataset, assigning features and spatial rules, validating the features in a map, and using specific tools to fix errors and mark exceptions.
To learn more, see Topology in ArcGIS.
In the Catalog pane
To get started, first create a geodatabase topology for the dataset containing the features participating in the topology. You can right-click the dataset in the Catalog pane, or use the geoprocessing toolset.
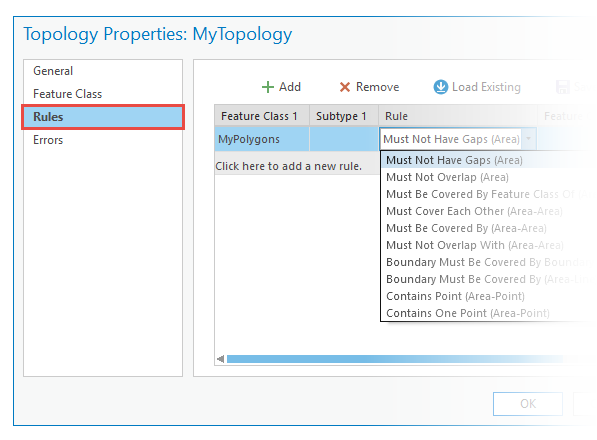
Next, right-click the topology object, click Properties and click the Rules tab. Add the feature classes and the rules against which you want to validate them; for example, polygon features and a rule that requires that polygons must not have gaps.

In a map
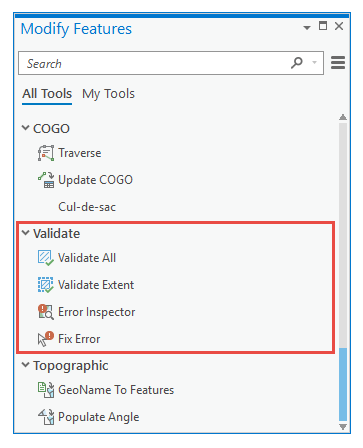
Add the dataset and topology object to a map to validate feature topology and fix errors. The topology validation tools are available in the Modify Features pane and on the Error Inspector toolbar.
To learn more, see Validate and fix geodatabase topology.

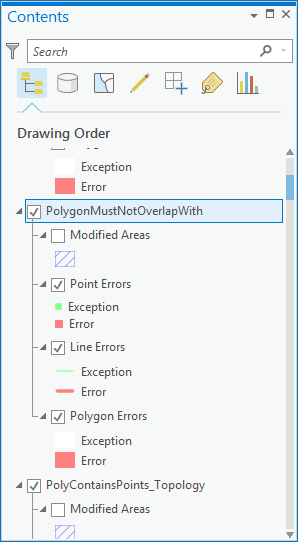
Each geodatabase topology rule appears as a symbolized group layer with sublayers organized by geometry type showing errors, dirty areas, and exceptions. In the Error Inspector table viewer  , errors and exceptions appear as line items.
The best practice to fix errors, is to first use the Fix Error tool  . Clicking the nonconforming feature geometry shows a list of predefined tools for fixing the specific error. If a tool does not exist, you can fix an error using standard editing tools.