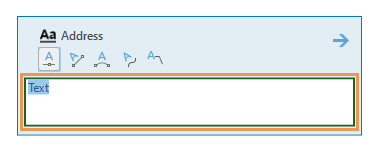
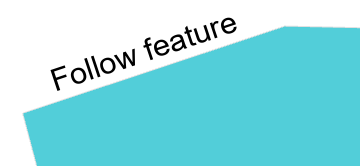
Annotation construction tools that appear with editing templates create horizontal annotation features with or without a leader line, straight or curved annotation using a temporary sketched baseline, and follow-feature annotation that is constrained to an edge of a line or polygon feature.
You can type a text string in the template text box or accept the default text and change it in the Attributes pane. You can also right-click another feature, click Find Text  and get the text string defined by its layer display field property.
Create horizontal, leader line, straight or curved annotation
Horizontal, straight, or curved annotation features are constructed by sketching a baseline that defines its location, and angular or curved shape. When the sketch is finished, the baseline is not visible. Further, you can change the baseline geometry using the Annotation tool  .
.
- Open a map containing the annotation feature layer you are editing or add the layer to the map.
Tip:
Before editing features, specify which layers can be edited, confirm that the coordinate system assigned to the active map is suitable for the type of edits you're performing, and enable the snap agents that allow you to work effectively.
For a basic checklist of settings, see Configure settings for editing.
- On the ribbon Edit tab, click Create
 in the Features group.
 The Create Features pane appears.
- Click an annotation feature template.
The tool palette and text box appear in the pane.
To change the formatting or attribute values, click the Active Template button
 .
. - Type the text string in the text box.

Alternatively, right-click an existing feature, click Find Text
 and get the text string defined by its layer display field property. If you clicked overlapping features, press N to cycle through the possible text strings.
 - Click and use one of the following tools:
Horizontal Annotation

Click the map to create the feature.
Leader Line Annotation

Click the map to create the leader start point, move the pointer and click the map again to create the feature.
Straight

Click the map, move the pointer or press A to specify the angle and click the map again to create the feature.
Curved Annotation

Click the map, move the pointer to specify the angle and click the map again to create the feature. Move the pointer to shape the Bezier curve and click the map.
- Click Finish
 or press the F2 key.
Create annotation that follows a feature
The Follow Feature tool  constrains an annotation feature along the edge of a line or polygon feature. You can create text that follows a feature using either standard annotation or feature-linked annotation.
The toolbar includes settings to flip annotation to either side of an edge, constrain it parallel or perpendicular and to the left or right side of an edge based on the direction of a segment. To change optional settings, right-click and choose Follow Feature Options  , or press O.
- Open a map containing the annotation feature layer you are editing or add the layer to the map.
Tip:
Before editing features, specify which layers can be edited, confirm that the coordinate system assigned to the active map is suitable for the type of edits you're performing, and enable the snap agents that allow you to work effectively.
For a basic checklist of settings, see Configure settings for editing.
- On the ribbon Edit tab, click Create
 in the Features group.
 The Create Features pane appears.
- Click an annotation feature template.
The tool palette and text box appear in the pane.
To change the formatting or attribute values, click the Active Template button
 .
. - Type the text string in the text box..

Alternatively, right-click an existing feature, click Find Text
 and get the text string defined by its layer display field property. If overlapping features are clicked, press N to cycle through the possible text strings.
 - Click the Follow Feature tool
 .
. - Click the line or polygon feature on which you want to wrap the text.
- Move the pointer along the boundary to position the annotation feature.
To move the text away from or closer to the selected edge, press Ctrl and move the pointer.

- To change the distance between the text and the boundary feature, press Ctrl as you move the pointer.
- To change the orientation or alignment of the text, use the following commands on the editing toolbar:
Flip Annotation

Flip text 180 degrees to either side of the followed edge.
Parallel/Perpendicular

Constrain straight text parallel or perpendicular to the feature.
Toggle Side

Constrain annotation to the left or right side of the feature based on the direction of the segment.

- Click Finish
 or press the F2 key.
Keyboard shortcuts
| Keyboard shortcut | Action | Comment |
|---|---|---|
Ctrl+W | Find text | Replace the text string in the text box with the label expression or field value from the topmost selected feature layer. When you select feature-linked annotation, the text is calculated from the origin feature class. If it can't be calculated, the word Text is used. |
N | Find the next text. | Step through the selected annotation features when using
Find Text |
F6 | Specify absolute X,Y,Z | Open the Absolute X,Y,Z dialog box. |
Tab | Switch sides Flip annotation | Flip unfinished text 180 degrees and to the left or right side of the followed edge. This shortcut is available when you create text with Follow feature |
O | Use the Follow Feature options. | Open the Editor Settings dialog box. This shortcut is available when you create text with Follow feature |
Ctrl and drag | Change the Follow Feature distance. | In Follow Feature mode, change the distance between the annotation feature and the boundary feature. |
 .
.