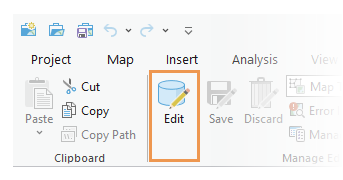
The Edit button enables and disables editing tools and editing templates. It is on the ribbon Edit tab in the Manage Edits group if it is turned on with edit session options settings. By default, this button is not available.
The Edit button can be configured to appear and function in one of the following ways:
| Edit button | Description |
|---|---|
Edit | When editing is enabled, ArcGIS Pro automatically selects the workspace and automatically starts an edit session when feature data is created or modified. Active edit sessions automatically stop when edits are saved or discarded. |
Edit | When editing is enabled, selecting a workspace on the Choose Workspace dialog box starts an edit session. The active edit session stops when editing is disabled. |
Commands such as Undo and Redo that are enabled or disabled for specific workspaces are listed in the following table:
| Workspace | Undo  | Redo  | Save  | Discard  |
|---|---|---|---|---|
File geodatabase |  |  |  |  |
Enterprise geodatabase |  |  |  |  |
Mobile geodatabase |  |  |  |  |
Shapefile |  |  |  |  |
Nonversioned enterprise geodatabase feature classes Single workspace editing mode |  |  | ||
Nonversioned enterprise geodatabase feature classes Multiple workspace editing mode |  | |||
Web feature layers with or without version management |  |  |  |  |
Default version of branch versioned web feature layers |
Tip:
When an edit session starts, feature data that is granted view and edit privileges at the data source is editable. To protect against unwanted editing, disable layer editability in the Contents pane .
Edit multiple workspaces
To enable or disable editing when the Edit button  is configured for multiple workspace edit sessions, complete the following steps:
- Click the ribbon Edit tab and click Edit
 in the Manage Edits group.
- Create, modify, or delete features on editable layers.
ArcGIS Pro automatically selects the workspace and automatically starts an edit session.
- Click Save
 or Discard
  on the ribbon Edit tab.
Active edit sessions automatically stop for the workspaces containing the edited features.
- To disable editing, click Edit
 on the ribbon Edit tab, in the Manage Edits group.
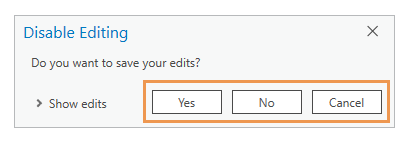
If editing is disabled with unsaved edits, click the appropriate response on the Disable Editing dialog box.

Editing tools and editing templates are disabled.
Edit a single workspace
To enable or disable editing when the Edit button  is configured for single workspace edit sessions, complete the following steps:
- Click the ribbon Edit tab and click Edit
 in the Manage Edits group.
The Choose Workspace dialog box appears.
- On the Choose Workspace dialog box, click the Map drop-down arrow
 and choose a map.
The workspaces in the map appear in the Workspaces view.
- In the Workspaces view, click the workspace containing the layers you are editing.
The layers in the workspace appear in the Layers view.
Tip:
To confirm whether a layer is editable, click the layer. Its editing status appears at the bottom of the dialog box.
- Click OK.
Editing tools and editing templates are enabled and an edit session starts for the selected workspace.
- Create, modify, or delete features on editable layers.
- To disable editing, click Edit
 on the ribbon Edit tab, in the Manage Edits group.
If editing is disabled with unsaved edits, click the appropriate response on the Disable Editing dialog box.

Editing tools and editing templates are disabled and the edit session for the selected workspace stops.