Data that is spatial in nature is not always stored in a spatial data format. For example, street addresses and latitude-longitude coordinates identify geographic locations but are often stored in spreadsheets, databases, or text files. If you have geographic information stored as a table, ArcGIS Pro can display it on a map and convert it to spatial data.
Overview
- This video was created with ArcGIS Pro 3.4.
In this tutorial, you'll create spatial data from a table containing the latitude-longitude coordinates of huts in a New Zealand national park. Huts in New Zealand are equivalent to cabins in the United States—they may or may not have sleeping bunks, kitchen facilities, electricity, and running water. The table of hut locations is stored as a comma-separated values file (.csv). CSV is a common, nonproprietary file format for tabular data.
- Estimated time: 45 minutes
- Software requirements: ArcGIS Pro Basic
Note:
The quick-start tutorials are updated at each software release. For the best experience, use an online help version that matches your software version.
Open the project
Your study area is Egmont National Park in the Taranaki region of New Zealand.
- Start ArcGIS Pro and sign in if necessary.
- Open a browse dialog box to search for the project in one of the following ways:
- On the start page, click Open another project
 .
. - In an open project, click the Project tab on the ribbon. In the list of side tabs, click Open. On the Open page, click Open another project
 .
.

- On the start page, click Open another project
- On the Open Project browse dialog box, in the navigation pane, under Portal
 , click ArcGIS Online
  .
.Note:
If you are signed in to ArcGIS Enterprise
 , you must set your active portal to ArcGIS Online to access the tutorial data. If you can't do this, you can download the data from a browser.
 - At the top of the dialog box, in the Search box, type Create points from a table and press the Enter key.
- In the list of search results, click Create points from a table to select the project package.
Note:
If there is more than one project package with this name, select the package with the Authoritative badge
 . In the Owner column, the owner name is ArcGISProTutorials. If you don't get any results, see No search results are returned.
 - Click OK.
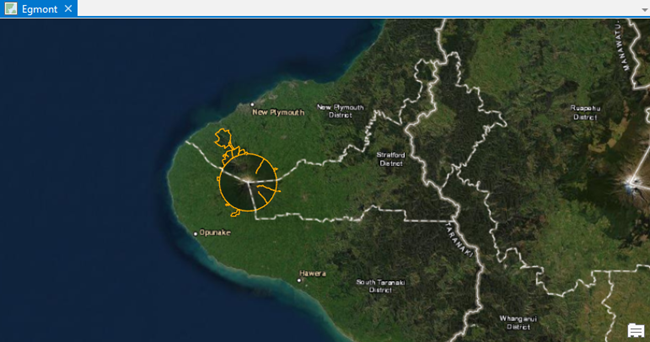
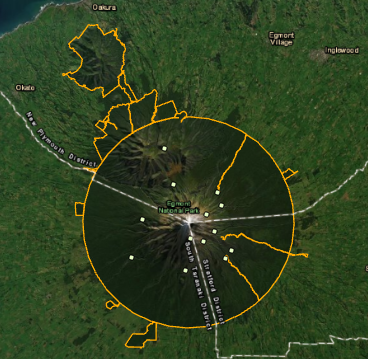
The project opens to the Taranaki region on New Zealand's North Island. The boundary of Egmont National Park is drawn with an orange outline. Mount Taranaki is in the center of the park.
The active view is a 2D map named Egmont. The project also contains a 3D scene named Egmont 3D, which is not currently open.
- On the ribbon, click the View tab. In the Windows group, click Pane Sets
 and click Mapping
  .
.This ensures that the Contents and Catalog panes are open and that other panes are closed.
- On the ribbon, click the Map tab. In the Navigate group, click Bookmarks
 . Under Egmont Bookmarks, click Egmont National Park to zoom in to the park.
Make a feature class from a .csv file
The .csv file is stored as an attachment in the project package. You'll add it to the map as a table and convert it to a feature class with a geoprocessing tool.
- On the Map tab, in the Layer group, click Add Data
 .
. - On the browse dialog box, in the navigation pane, under Project
 , click Folders
  .
. - In the file list on the right, browse to Create_points_from_a_table > commondata > userdata.
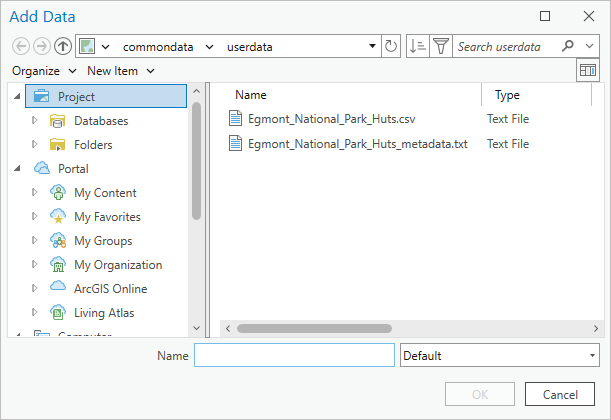
The userdata folder contains a .csv file and a text file with metadata.
- Click Egmont_National_Park_Huts.csv to select it and click OK.
The .csv file is added to the Contents pane under Standalone Tables.
Note:
In a project package, files that can't be stored in a geodatabase—such as shapefiles, .csv files, and text files—are included as attachments. In the project package folder structure, attachments are stored in the <project home folder>\commondata\userdata folder.
- In the Contents pane, right-click Egmont_National_Park_Huts.csv and click Open
 .
.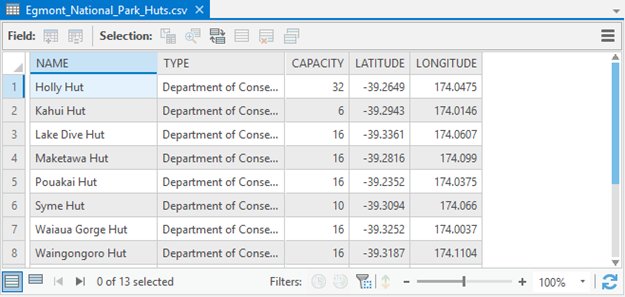
The table's attributes include the name and type of hut, the number of people it accommodates, and its latitude-longitude coordinates in decimal degrees. Latitude-longitude coordinates, or some other set of x,y coordinate system values, are needed to create a feature class from a table.
- Close the table.
- In the Contents pane, right-click Egmont_National_Park_Huts.csv, click Create Points From Table
 , and click XY Table To Point
  .
.The XY Table To Point tool appears in a window. The Input Table parameter is correctly set to the .csv file. The X Field and Y Field parameters are also correctly set to LONGITUDE and LATITUDE, respectively.
Note:
For convenience, some geoprocessing tools open in a floating window. You can also open these tools in the Geoprocessing pane.
- In the Output Feature Class text box, change the name to ENP_Lodgings.
You can delete the entire path and replace it with the name. The path to the default geodatabase is restored automatically. (ENP stands for Egmont National Park.)
- Leave the Z Field parameter empty because the table doesn't contain
elevation values for the huts.
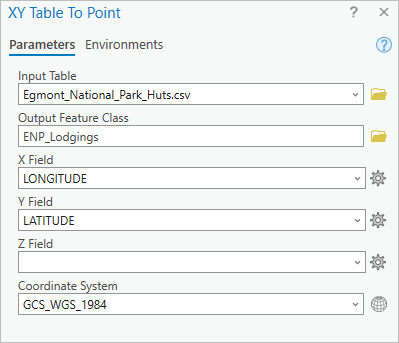
The Coordinate System parameter is set to GCS_WGS_1984. This coordinate system is used by default because it is a common one for latitude-longitude values. You'll check the metadata text file to confirm that this setting is correct.
- In the Catalog pane, expand Folders
 and browse to Create_points_from_a_table > commondata > userdata.
 - Right-click Egmont_National_Park_Huts_metadata.txt and click Show In File Explorer
 .
.A File Explorer window opens to the location of the file.
- In File Explorer, double-click the file to open it in your default text editor.
The data has been processed, but in the third paragraph you can see that the coordinates are now in the GCS_WGS_1984 coordinate system. This means that the tool's coordinate system setting is correct.
- Close the text file and close the File Explorer window.
- In ArcGIS Pro, on the XY Table To Point tool, click OK.
Note:
The basemap imagery changes at different levels of detail. Depending on your map scale, the basemap may look different from the images in the tutorial.
When the operation finishes, a new feature class is created in the project geodatabase. A layer named ENP_Lodgings, representing the hut locations, is added to the map with default symbology. The color of your symbols may be different.
- In the Catalog pane, expand Databases
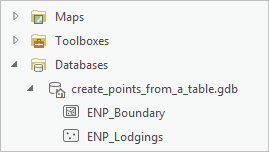
 and expand create_points_from_a_table.gdb to see the new feature class.
Add metadata
You'll add item description metadata to the feature class. An item description includes a title, summary, description, and tags. It may also include credits and use limitations. Metadata provides important background information about your data. It is also indexed by ArcGIS Pro to generate search results when you search for data.
- In the Catalog pane (not the Contents pane), right-click the ENP_Lodgings feature class
 and click Edit Metadata
  .
.A metadata view opens. In the Contents pane, the elements of the current metadata style are displayed.
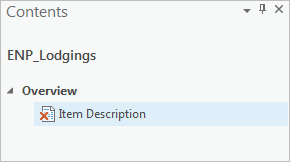
If you are using the default Item Description style, the only element listed in the Contents pane is Item Description. The element is currently invalid
 because required information is missing. If you are using a different metadata style, you'll see other metadata elements as well. Item Description is the only element you will edit in this tutorial.
 - In the metadata view, in the Title box, type Egmont National Park Lodgings.
You won't create a thumbnail image of the data, but you may want to do that later on your own.
- In the Tags box, type (or copy and paste) the following keywords: cabins, hotels, huts, Egmont National Park, Taranaki, New Zealand.
Make sure the keywords are separated by commas.
- In the Summary (Purpose) box, add the following text: Locations of huts, lodges, and hotels in Egmont National Park for planning hiking and ski trips.
- Click in the Description (Abstract) text box.
In the Contents pane, the Item Description element is now marked valid
 because the required information is present.
 - In the Description (Abstract) box, add the following text: Features were created from a CSV file with latitude-longitude coordinates and projected to NZTM. The source coordinates were derived from measurements made by Peter Scott. Peter Scott’s data was published on May 13, 2015, and is shared under a Creative Commons Attribution 3.0 New Zealand license. Peter Scott’s dataset is more accurate than this dataset. For more information, see the online dataset Egmont National Park - Huts, accessible at https://koordinates.com. Additional features in this dataset were digitized on the Esri World Imagery basemap.
- In the Credits box, add the following text: Peter Scott (peter@zoneblue.org); koordinates.com.
- Under Credits, click New Use Limitation
 . In the Use Limitation box, add the following text: Creative Commons Attribution 3.0 New Zealand.
Note:
If spell-checking is enabled (as it is by default), unrecognized words are marked with wavy red underlines.
- On the ribbon, on the Metadata tab, in the Manage Metadata group, click Save
 .
. - Close the ENP_Lodgings metadata view.
- On the Quick Access Toolbar, click Save Project
 .
.
Examine the layer
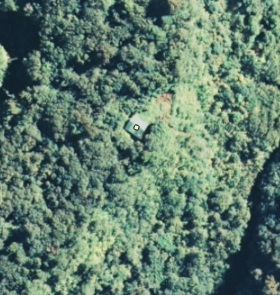
You'll zoom in on the map to confirm that the point features are located on actual buildings. You'll also change the layer's name.
- On the Egmont map, zoom in close on any point feature.
- Optionally, examine one or two other features.
- In the Contents pane, right-click the ENP_Lodgings layer and click Properties
 .
. - On the Layer Properties dialog box, on the General tab, in the Name text box, change the layer name to Lodgings. Click OK.
The layer name is updated in the Contents pane. The name of the feature class in the geodatabase—the layer's data source—does not change.
- On the ribbon, click the Map tab if necessary. In the Navigate group, click Bookmarks
 . Under Egmont Bookmarks, click Egmont National Park.
 - On the Quick Access Toolbar, click Save Project
 .
.
Symbolize the layer
You'll set a minimum visibility scale for the Lodgings layer so the huts don't display at very small scales. You'll choose a new symbol and set scale-based sizing so the symbols get larger as you zoom in.
- In the Contents pane, click the Lodgings layer to select it, if necessary. On the ribbon, click the Feature Layer tab.
- In the Visibility Range group, click the drop-down arrow next to Minimum Scale
 and click 1:500,000.
Tip:
If 1:500,000 is not in the drop-down list, type the value directly into the input box or choose a different value.
- In the Contents pane, click the symbol for the Lodgings layer.
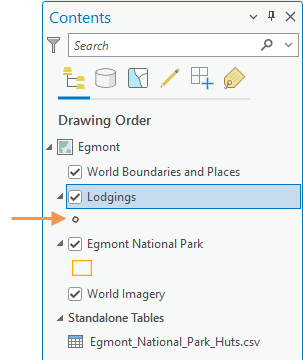
The Symbology pane appears and displays options to format point symbols.
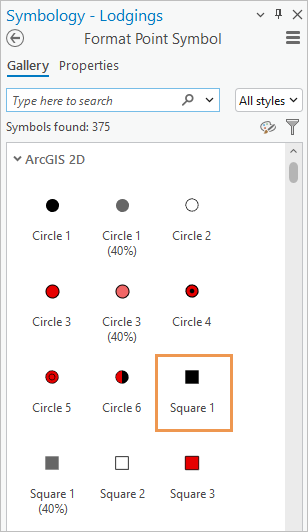
- At the top of the pane, click the Gallery tab, if necessary. In the scrolling box of symbols, under ArcGIS 2D, click Square 1. (Choose the solid black symbol, not Square 1 40%.)
- At the top of the pane, click the Properties tab. Confirm that the Symbol tab
 is selected under it.
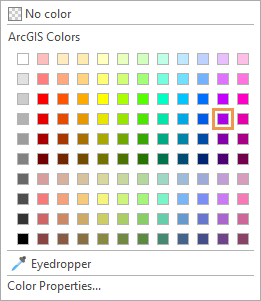
 - Under Appearance, click the Color drop-down arrow. On the color palette, click Anemone Violet.
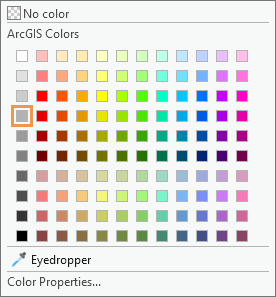
- Change the Outline color setting to Gray 30%.
- Change the Outline width value to 1.5 pt and press the Enter key.
- Check the Enable scale-based sizing check box.
A slider appears under the check box. It has two size stops (short vertical bars) that represent the minimum and maximum map scales for which symbol sizes can be set.
- Hover over the left size stop.
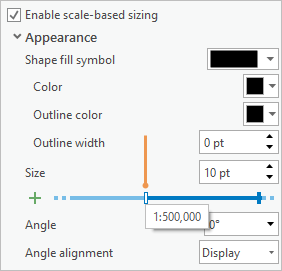
The first stop is set at 1:500,000. This is the smallest scale at which the layer is visible because of your minimum scale setting.
- Hover over the other size stop.
This stop is set at 1:1,000, the largest scale to which you can assign a symbol size. You can zoom in closer than 1:1,000 on the map, but the symbol size won't increase. The second stop is currently selected (blue). Above the slider, the size value for the selected stop is 10 pt.
- Change the Size value to 12 pt.
This will be the maximum size of the symbol.
- Click the first size stop to select it.
The size value for this stop is currently 10 pt.
- Change the Size value to 2 pt.
When the map scale is 1:500,000, the Lodgings symbol will be 2 points. As you zoom in, the symbol size will gradually increase until it reaches a maximum size of 12 points.
- At the bottom of the pane, click Apply.
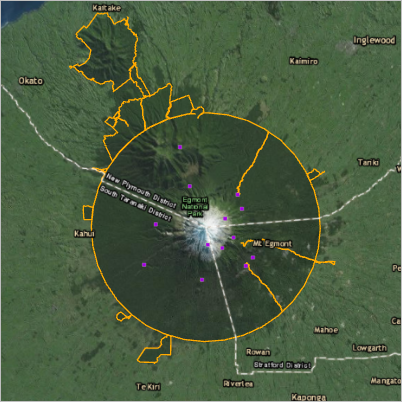
At the current map scale, the symbol outline may not be noticeable.
Note:
In ArcGIS Pro, thin lines are simulated with partial transparency using antialiasing. If you need to see a thin line, such as a symbol outline, at all scales, set the antialiasing mode to None in the display options for the application.
- On the ribbon, click the Map tab. In the Navigate group, click Bookmarks
 . Under Egmont Bookmarks, click Taranaki Region.
The map zooms out to a regional scale and the symbols do not display on the map.
- In the map scale box at the bottom of the map view, click the drop-down arrow and click 1:500,000.
The layer displays and the features appear at their minimum size.
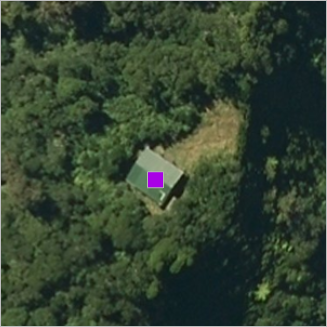
- Zoom in gradually to see the symbol size increase.
- Go to the Egmont National Park bookmark.
- On the Quick Access Toolbar, click Save Project
 .
.
Add a feature interactively
The Lodgings layer has 12 features: nine huts that belong to the Department of Conservation and three that belong to alpine clubs. In addition, there are two resort hotels inside the park that aren't included in the .csv file. In this section, you'll locate the first of these hotels, Dawson Falls Mountain Lodge, and add a feature to the ENP_Lodgings feature class.
- On the ribbon, on the Map tab, in the Inquiry group, click Locate
 .
.The Locate pane appears.
- In the Locate pane, click Options
 to see your locate providers. Confirm that ArcGIS World Geocoding Service is included in the list and that it is enabled.
A locate provider finds map locations from text descriptions or spatial coordinates. Default locate providers with ArcGIS Pro include XY provider and ArcGIS World Geocoding Service.
- Click Options
 again to collapse the list.
You'll search for Dawson Falls Mountain Lodge by its name.
- In the Locate pane, in the search box, type Dawson Falls Mountain. Do not press the Enter key.
As you type, a list of suggestions appears and updates.
- Hover over the first entry for Dawson Falls Mountain Lodge (there may be more than one) and confirm that the address is Dawson Falls Mountain Lodge, Manaia Road, Egmont National Park, Taranaki, 4391, NZL.

- Click the highlighted entry.
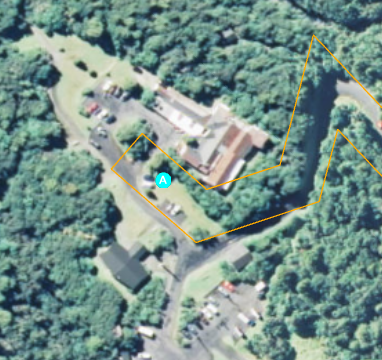
The map zooms in and a marker is placed at the end of Manaia Road.
- In the map scale box at the bottom of the view, click the drop-down arrow and click 1:1,000.
The marker is placed about 70 meters to the north of the lodge building.
- In the Locate pane, right-click the marker and click Add To Feature Class
 .
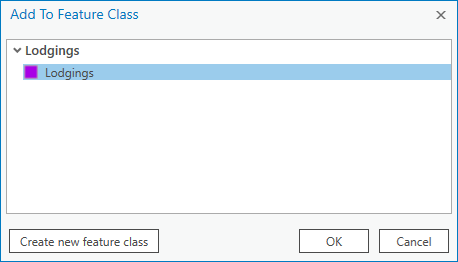
. - On the Add To Feature Class dialog box, expand Lodgings and click the Lodgings feature template.
- Click OK.
- In the Locate pane, in the search box, click Delete
 to clear the address.
The temporary marker is removed from the map. The new feature is added to the Lodgings layer and is selected. It is not saved to the feature class until you save edits.

- On the ribbon, click the Edit tab. In the Manage Edits group, click Save
 .
.The Save Edits prompt appears.
- Click Yes on the prompt.
Note:
You can customize the editing environment in many ways to suit your working preferences.
- On the Quick Access Toolbar, click Save Project
 .
.
Move the feature and edit its attributes
You'll move the feature from its current location and place it directly on the building. Then you'll edit its attributes.
- On the ribbon, on the Edit tab, in the Features group, click Modify
 .
.The Modify Features pane appears. At the top of the pane, the All Tools tab is selected.
- In the Modify Features pane, under Alignment, click Move
 .
.The pane updates and the Move tool is selected. On the map, the selected feature is highlighted in yellow. At the bottom of the view, the editing toolbar appears.
Tip:
You can configure the editing toolbar to change its size and position, and you can turn it on or off.
- On the map, hover over the selected feature. When the mouse pointer changes to a four-headed arrow, drag the feature to the building and release the mouse button.
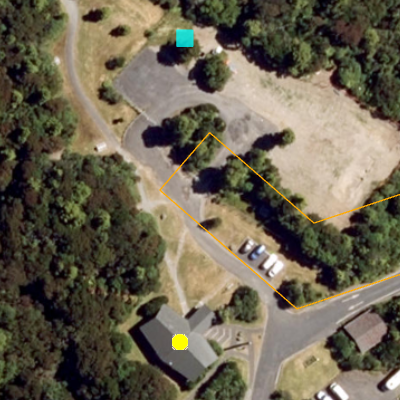
The yellow highlight now appears on the building. The original feature location remains visible in case you decide not to commit the edit.
- On the editing toolbar, click Finish
 .
.On the map, the selected feature moves to the building. If the feature placement isn't right, click Undo
 on the Quick Access Toolbar. In the Modify Features pane, click Move
  and repeat the operation.
 - On the ribbon, on the Edit tab, in the Selection group, click Attributes
 .
.The Attributes pane appears and displays the attributes of the selected feature. In the lower half of the pane, on the Attributes tab, the NAME field is automatically populated with information from the Locate pane search.
- On the Attributes tab, click in the NAME text box and edit it to Dawson Falls Mountain Lodge. Press the Tab key.
- In the TYPE box, type Hotel and press the Tab key.
- In the CAPACITY box, type 24 and press the Enter key. Click Apply.

You'll leave the <Null> values in the LATITUDE and LONGITUDE fields.
- On the Edit tab, in the Manage Edits group, click Save
 . Click Yes on the Save Edits prompt.
Both the spatial and attribute edits to the new feature are saved.
- In the Selection group, click Clear
 .
.
Add another feature
The second hotel in the park is the Stratford Mountain House on Pembroke Road. You'll locate it by its latitude-longitude coordinates.
- Make the Locate pane active. In the search box, type (or copy and paste) 174.12248, -39.306201 and press the Enter key.
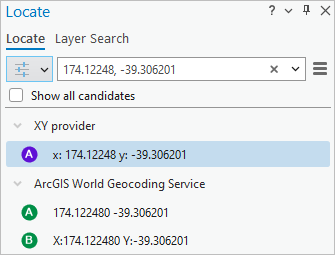
Results are found by both the XY provider and the ArcGIS World Geocoding Service. The map zooms to the XY provider location highlighted in the pane and a marker is added.
- In the Locate pane, right-click the highlighted candidate and click Add To Feature Class
 .
. - On the Add To Feature Class dialog box, expand the Lodgings heading, if necessary, and click the Lodgings feature template. Click OK.
- In the Locate pane, in the search box, click Delete
 to remove the temporary marker.
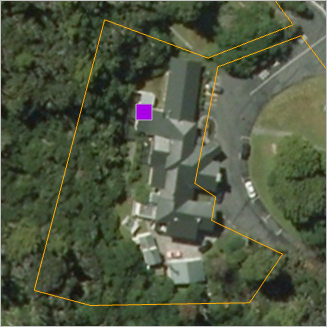
A new feature representing Stratford Mountain House is added to the layer and is selected. In this case, the feature is placed on the building and doesn't need to be moved.
- Make the Attributes pane active. On the Attributes tab, click in the NAME text box and replace the x,y coordinates with Stratford Mountain House. Press the Tab key.
- In the TYPE box, type Hotel and press the Tab key.
- In the CAPACITY box, type 22 and press the Enter key. Click Apply.
- On the ribbon, on the Edit tab, in the Manage Edits group, click Save
 . On the Save Edits prompt, click Yes.
 - In the Selection group, click Clear
 .
.
- In the Contents pane, right-click the Lodgings layer and click Attribute Table
 . Scroll to the bottom of the table.
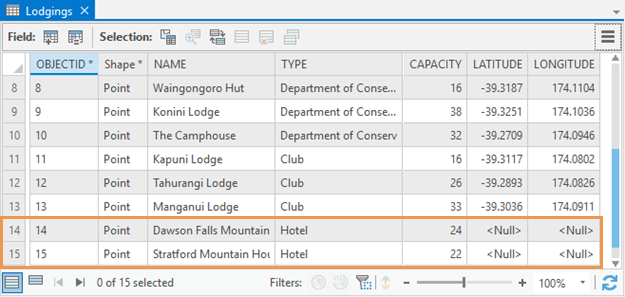
The table has 14 records, including records for the two features you just created.
- Close the table.
- On the ribbon, click the Map tab and go to the Egmont National Park bookmark.
- On the Quick Access Toolbar, click Save Project
 .
.
View the layer in the 3D scene
You can display 2D layers in 3D scenes. The scene's elevation surface correctly positions the 2D features in a 3D landscape. You'll copy the Lodgings layer from the Egmont map to the Egmont 3D scene, apply 3D drawing properties, and change the symbol.
- In the Contents pane, right-click the Lodgings layer and click Copy
 .
. - Make the Catalog pane active and expand Maps
 . Right-click Egmont 3D and click Open Local View
  .
.The Egmont 3D scene opens and becomes the active view.
Tip:
You can open any scene in global or local view mode. This scene has a relatively small extent and uses a projected coordinate system, so a local view is appropriate. To change the view mode of an open scene, click the View tab on the ribbon. In the View group, click Global
 or Local
  .
. - In the Contents pane, right-click the scene name, Egmont 3D, and click Paste
 .
.The Lodgings layer appears in the 2D Layers category of the Contents pane and the features draw on the map.
- On the ribbon, on the Map tab, in the Navigate group, make sure the Explore tool
 is selected.
 - Use the mouse buttons and wheel button to zoom, pan, tilt, and rotate the scene. Alternatively, use the on-screen navigator
 in the scene.
The features display in their correct locations on the 3D surface, but the symbols lie flat on the surface—like bits of paper stuck to the mountain.
Tip:
If you get lost while navigating, go to any of the Egmont 3D bookmarks.
- In the Contents pane, drag the Lodgings layer from the 2D Layers category to the 3D Layers category.
The layer now uses 3D drawing properties.
- In the Contents pane, double-click the Lodgings layer to open its properties.
- On the Layer Properties dialog box, click the Display tab. Under Display symbols in scene, confirm that the Screen units option is selected. Click the Improved perspective check box and click OK.
The symbols now stand up on the surface and display at an appropriate size.
- In the Contents pane, click the symbol for the Lodgings layer.
- In the Symbology pane, under Format Point Symbol, click the Gallery tab, if necessary.
- In the list of symbols, under ArcGIS 3D, click Standing Cube.
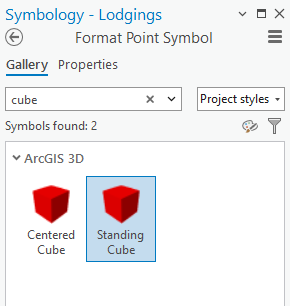
The symbols are updated on the map.
- At the top of the pane, click the Properties tab. Click the Symbol tab
 under it, if necessary.
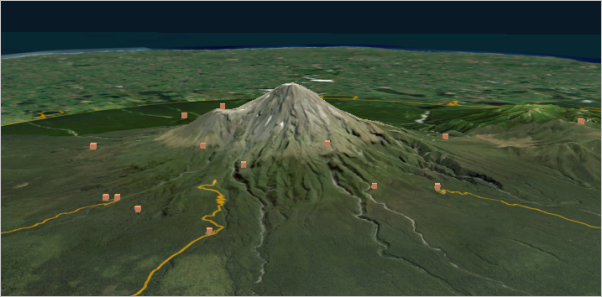
 - Click the Color drop-down arrow and click any color. Change the Size setting to 9 pt and click Apply.
Note:
Scale-based sizing is not available in scenes. For this scene, a 9 point symbol works well at most scales but may be too small at some scales and too large at others.
- Continue to explore the scene using navigation tools and Egmont 3D bookmarks.
- On the Quick Access Toolbar, click Save Project
 .
.
You can convert a tabular dataset, such as a Microsoft Excel file or a .csv file, to spatial data in ArcGIS Pro as long as the table includes street addresses or spatial coordinates. This allows you to visualize and spatially analyze a wide variety of data—from customer lists to tables obtained from websites—that is spatial in nature but not yet spatially enabled.
