Available with Standard or Advanced license.
Two-way replication allows data changes to be sent multiple times from the parent replica to the child replica or from the child replica to the parent replica. If the same row is edited in both replica geodatabases, it is detected as a conflict when the replicas are synchronized. Conflict resolution policies are provided to define how conflicts are processed. When creating two-way replicas, the child replica must be an enterprise geodatabase. See Replication types to learn more.
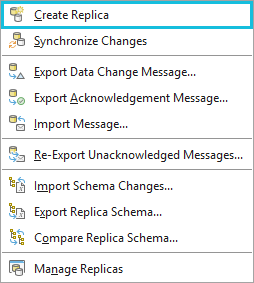
You can use the Create Replica option  from the Distributed Data context menu to create a two-way replica from an enterprise geodatabase. Two-way replicas continue to exist after synchronization, allowing you to continue editing and synchronizing the replicas.
Before getting started, see Prepare data for replication to review the data requirements. For a list of data types supported with geodatabase replication in ArcGIS Pro, see Replication and geodatabase compatibility.
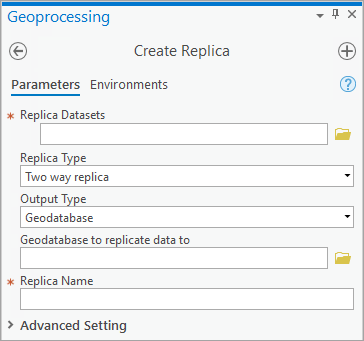
Use the Create Replica geoprocessing tool to create a two-way replica. You can open the tool from the Distributed Geodatabase context menu or the Geoprocessing pane.
- Start ArcGIS Pro and open an existing ArcGIS Pro project, or begin without a template.
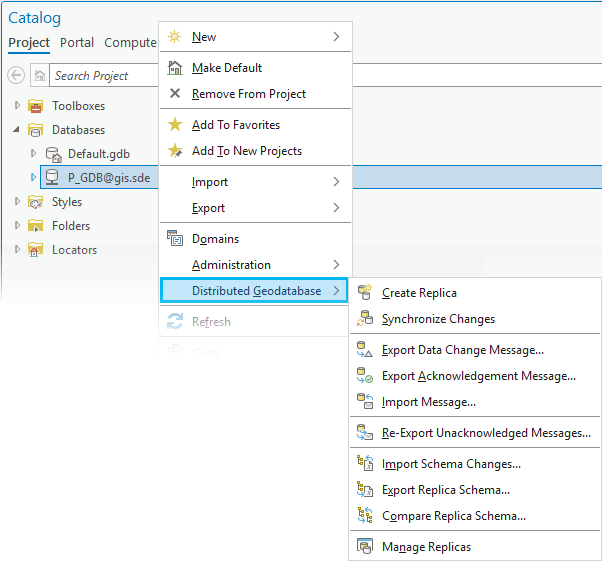
- In the Catalog pane, right-click an existing geodatabase connection and click the Distributed Geodatabase context menu.
Note:
To create a replica, you must connect to the enterprise geodatabase as a user with privileges to create data in the database.
- Select Create Replica
 .
. - For Replica Datasets, use the browse button to select the layers to replicate.
Note:
- There must be at least one layer in the map for the Add Many button
 to appear.
 - Use Add Many
 next to Replica Datasets to add multiple datasets at once.
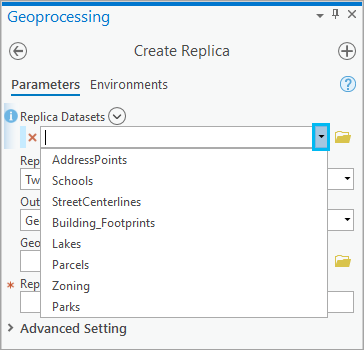
 - If you are replicating a subset of data, apply definition queries as described in Determine datasets to replicate. Then use the drop-down menu to add datasets containing a subset of data to this replica. If the browse button is used to select datasets containing a subset of data instead of the drop-down menu, the definition queries will not be honored, and the default behavior will be applied.
- When including tables in the replica, it’s important to understand that the default behavior is to replicate only the schema of the table. To replicate all records for a specific table, follow the steps in Create a subset of data to be replicated to specify the SQL expression 1=1 as the definition query on the table. To replicate all the records for all tables to the child geodatabase replica, use the All records for tables option on the Create Replica geoprocessing tool under Advanced Setting. To replicate a subset of records, set the appropriate SQL expression.
- There must be at least one layer in the map for the Add Many button
- Ensure Two way replica is selected from the Replica Type drop-down menu.
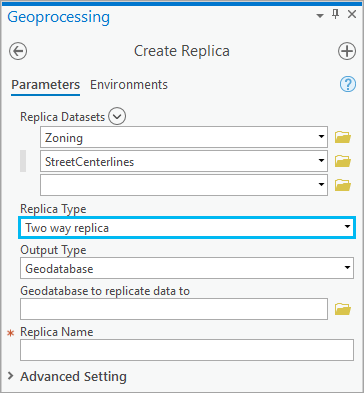
Two way replica is the default setting.
- From the Output Type drop-down menu, choose Geodatabase (default) or XML file.
- If you choose Geodatabase, click the browse button
 next to Geodatabase to replicate data to and browse to the geodatabase or geodata service that will host the child replica.
 Tip:
Ensure that the database connection you choose contains credentials for a user that has privileges to create data in the database.
- If you
choose XML file, click the browse button
 next to XML file to replicate data to to browse to the location and provide a name for the XML file that will host the child replica.
 Tip:
You can later use this output XML file as input into another geodatabase by using the Import XML Workspace Document tool.
Replicating data in a disconnected environment is only possible if you replicate the data to an XML workspace document. To learn more, see Replicas in a disconnected environment.
- If you choose Geodatabase, click the browse button
- For Replica Name, type a name to identify the replica.
The name of each replica must be unique to the user creating the replica.
Note:
When deciding on a replica name, make note of these additional rules:- Names must begin with a letter, not a number or special character such as an asterisk or percent sign.
- Names cannot contain spaces. If you have a two-part name for the replica, connect the words with an underscore.
- The length of a replica's name is limited to 128 characters.
- Names cannot contain reserved words, such as select or add. Reserved words for object names are specific to the database where the geodatabase resides; therefore, consult the database documentation for additional reserved words.
- Click Advanced Setting to expand additional options if you want to override the replication default options. If you are not changing the default options, skip to step 15.
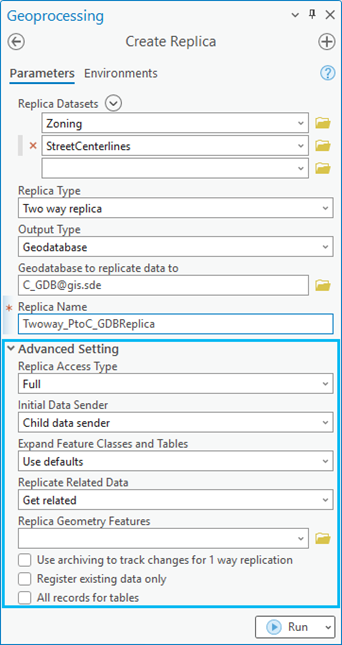
- Under Advanced Setting, for Replica Access Type, choose Full or Simple for the geodatabase model.
- Use Initial Data Sender to specify which replica can send changes when in disconnected mode.
This ensures that the relative replica doesn't send updates until the changes are first received from the initial data sender. If you are working in a connected mode, this parameter is not used.
- Child data sender—The child replica is the initial data sender. This is the default.
- Parent data sender—The parent replica is the initial data sender.
- Select one of the following options from the Expand Feature Classes and Tables drop-down menu:
- Use defaults—The replica will include the tables that are part of any extended dataset type—such as a topology, relationship class, or network—in which the feature classes or tables in the replica participate. The default for feature classes is to replicate all features intersecting the spatial filter. If no spatial filter has been provided, all features are included. The default for tables is to replicate the schema only.
- Add with schema only—Adds the schemas of the feature classes and tables in the extended datasets but not the data for them.
- All rows—Adds all rows for the feature classes and tables in the extended datasets.
- Do not add—Adds the datasets that you defined in step 4, but does not add the feature classes and tables from the extended dataset types in which the datasets participate.
- For Replicate Related Data, choose Get related or Do not get related to specify whether to replicate rows related to rows already in the replica.
Get related is the default setting.
See Replication and related data to learn more about how this setting works.
- Use one of the following options to define which features will be included in the replica:
- Choose a feature layer from the Replica Geometry Features drop-down menu.
The replica geometry features can be a feature layer that contains one or more points, lines, or polygons.
If there is one feature in the feature layer, the features in the replica datasets that intersect that feature will be replicated. If there are two or more features in the feature layer, the geometries are merged, and only data that intersects the merged geometries will be replicated.
If filters (such as a definition query) have been defined on the replica geometry features, only features that satisfy these filters will be used to define the replica geometry.
- Use the Extent environment setting to define which features will be included in the replica.
If both Replica Geometry Features and the Extent environment are set, the Replica Geometry Features setting is used.
If neither Replica Geometry Features nor the Extent environment is specified, the full extent of the data is used.
- Choose a feature layer from the Replica Geometry Features drop-down menu.
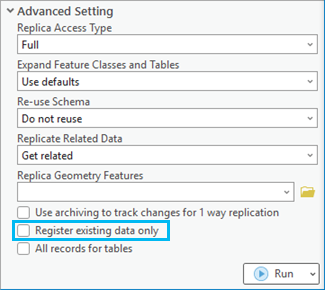
- Optionally, check Register existing data only if the data already exists in the child geodatabase and is used to define the replica datasets.
If Register existing data only is unchecked, which is the default, data in the parent geodatabase is copied to the child geodatabase.
Note:
- If the Register existing data only option is checked, the All records for tables option will not be available.
- See Register existing data only for a list of additional geodatabase replication requirements that must be met prior to selecting this option on the Create Replica geoprocessing tool.
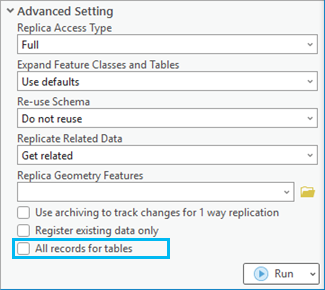
- Optionally, use All records for tables to specify whether all records or only the schema will be copied to the child geodatabase for tables that do not have filters applied (such as selections or definition queries).
- Checked—For tables with no applied filters, all records will be copied to the child geodatabase for tables. This option will override the Expand Feature Classes and Tables parameter value.
- Unchecked—For tables with no applied filters, only the schema will be copied to the child geodatabase for tables. Tables with applied filters will be honored. This is the default.
Note:
The All records for tables option will not be available if the Register existing data only option is checked. - Click Run to create the replica.
Note:
You can click the Run drop-down menu and select Schedule Run to run the tool at a later date and time and, optionally, with recurrence.

