Table templates insert records (rows) into existing tables and write the stored attribute values to the specified fields. You can create them with default settings by dragging a table into a map or author them manually by selecting an existing table or a record.
Add or create a table
In the Catalog pane, add or create a table in the current map. These operations automatically create a table template with default settings.
- On the ribbon, click the View tab. Click Catalog Pane
 , and expand Databases
  .
. - Drag the table onto the map.
- To create a table, right-click the geodatabase or dataset, click New, and click Table.
Select a table
In the Manage Templates pane layer view, click the table layer for which you want to author a template and click New Template  on the template view toolbar.
- On the ribbon, click the Edit tab. In the Manage Edits group, click Manage Templates

Alternatively, click Manage Templates
 in the Create Features pane.
 - In the layer view, expand Map
 and click the table layer.
 - On the template view toolbar, click the New drop-down arrow
 and click Template
  .
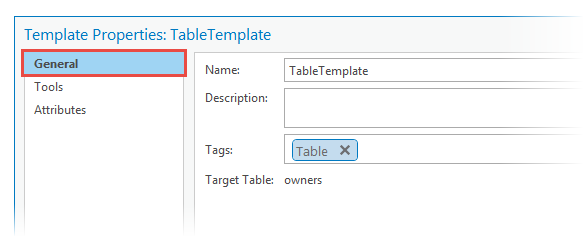
. - In Template Properties, click the General tab and type the template name and optional metadata for searching and sorting.
- In the Name box, type a name.
- In the Description box, type optional descriptive information.
- In the Tags box, type optional keywords and press Enter for each word. The keyword Table is automatically generated.
To delete a tag, click X.

- Click the Tools tab and check the Insert Row command
 .
. - Click the Attributes tab and type the attribute values you want written for each new row the template creates.
- Check or uncheck the following optional settings for displaying attribute fields.
Show nonvisible fields Show all hidden fields on the Template Properties dialog box.
Prompt for attribute value Show the field in the Create Features pane below the tool palette for quick access.
- Click OK.
Select a record
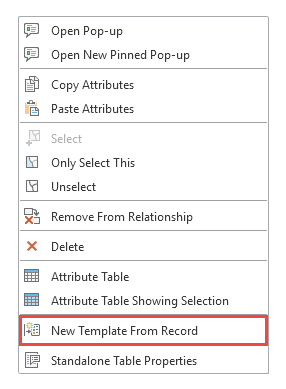
In the Attributes pane tree view, expand the selection, right click a record and click New Template From Record  .
.
- On the ribbon, click the Edit tab. In the Selection group, click Attributes
 .
.
- In the Attributes pane, click the Select tool
 and select a feature containing a record in the table for which to create a template.
 - Expand the feature in the selection tree view, right-click the record, and click New Template From Record
 .
.