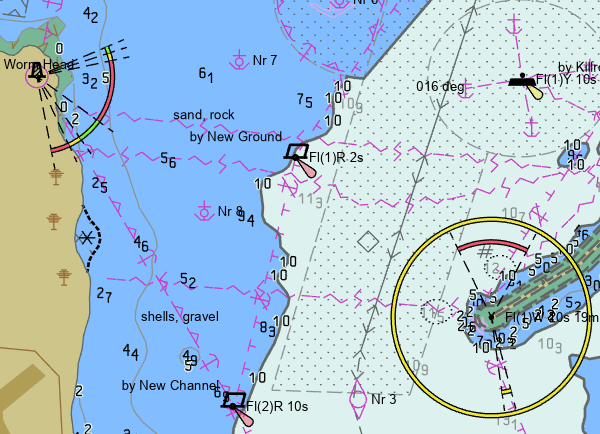
ENC layers display electronic navigational charts with S-52 symbology. You configure symbology at the layer level. When viewing multiple ENC layers at once, it's important to use the same symbology settings for a consistent view of the navigational chart data.

Add data
ENC layers are created from 5-57 cells (.000 files), which represent navigational chart data at a particular scale.
Add an ENC layer from an S-57 cell using the Catalog pane
To add an S-57 cell data source directly to ArcGIS Pro to create an ENC layer, complete the following steps:
- In the Catalog pane, right-click the S-57 cell.
- Click Add To Current Map.
An ENC layer is created.
Add an ENC layer from an S-57 cell using the Add Data button
To add an S-57 cell data source directly to ArcGIS Pro to create an ENC layer using the Add Data button, complete the following steps:
- On the Map tab, in the Layer group, click Add Data.
- Browse to and select the S-57 cell file in the file system.
- Click OK.
An ENC layer is created.
ENC sublayers and subtables
ENC layers are added to the Contents pane as composite layers. You can expand the ENC layer to see its spatial objects represented as sublayers and nonspatial objects represented as subtables. However, you cannot add or remove sublayers in the ENC layer in the Contents pane. Sublayers exist for each object type and geometry combination that exists in the S-57 cell. Sublayers and subtables are ordered alphabetically by object type in their respective sections. This order does not reflect the order of drawing in S-52 symbology. You can switch the visibility of sublayers and the layer will redraw with those objects removed.
Attribute tables can be opened for sublayers and subtables using the Attribute Table context menu command. Selections made in the table are reflected in the map. Graphic selections made in the map are reflected in the table.
Work with ENC objects as feature layers or stand-alone tables
While ENC sublayers and subtables provide a tabular view of data, and ENC sublayers allow for switching visibility, they are not independent layers and cannot be symbolized outside of ENC symbology or used as input for analysis. To use objects in this way, you need a feature layer or stand-alone table. Use the Make Feature Layer From Sublayer command  on the sublayer context menu to create a feature layer that represents the objects of the ENC sublayer. Use the Make Standalone Table from Subtable command
  on the sublayer context menu to create a feature layer that represents the objects of the ENC subtable. The feature layers and stand-alone tables created from these commands can then be used with workflows that use these layer types.
Configure ENC layer symbology
ENC symbology is grouped into logical categories for viewing and configuration. Some options refer to specific object types in an S-57 cell and only affect display if the objects or attributes are present. For example, there is a Submarine cables and pipelines option in Viewing groups, but the cables and pipeline may not be present in all cells. ENC sublayer visibility settings in the Contents pane take priority when determining whether an object is drawn. For example, an object will not draw even if the symbology option is set to display the viewing group containing that object type if the visibility for that sublayer is turned off in the Contents pane.
To configure ENC layer symbology, complete the following steps:
- Select an ENC layer in the Contents pane.
- On the ENC Layer tab, in the Drawing group, click Symbology.
- In the Symbology pane, choose a symbology subgroup to modify:
- Depth contours—Set depth contours to change the display of the navigational chart.
- Depth information—Choose high-level depth information to view.
- Display options—Choose the display categories to view and whether to honor them.
- Symbolization—Set high-level symbolization choices for the entire layer.
- Viewing groups—Set whether to view or hide logical groups of features.
- Text groups—Choose which objects to show labels for. Labels do not show for viewing groups that are not visible. For example, you cannot view Light descriptions values if Lights values are not visible.