Disponible avec une licence Workflow Manager.
The Descriptive Information tab on the job view allows you to view job information and modify editable job attributes, such as job name, assignment, start and due dates, priority, description, and spatial data.
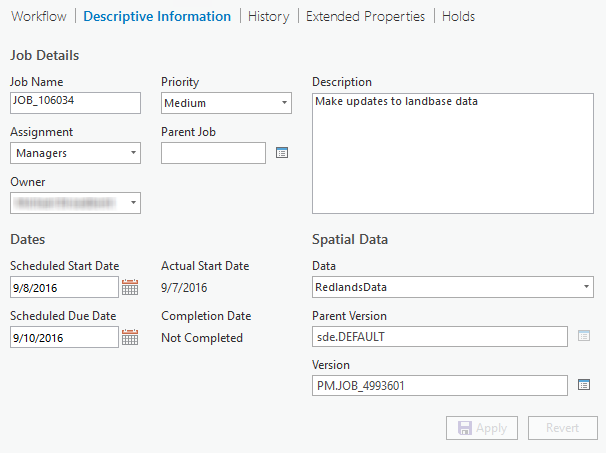
Edits to attributes can be saved by clicking Apply or discarded by clicking Revert.
Remarque :
The ability to modify job attributes on the Descriptive Information tab is controlled by privileges. If you are unable to edit job attributes, consult with your organization's Workflow Manager (Classic) administrator.
Modify job details
The Job Details section allows you to change job attributes.
- Type a name in the Job Name text box to change the name of the job.
- Click the Assignment drop-down arrow to assign the job. Jobs can be assigned to a user or a group stored in the Workflow Manager (Classic) repository.
- Click the Job Owner drop-down arrow to change the job owner.
- Click the Priority drop-down arrow to change the urgency of the job.
- Click the browse button next to Parent Job.
The Select Parent Job dialog box appears.
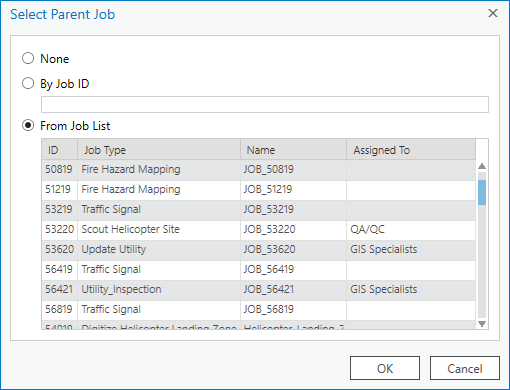
- Choose one of the following options to change the parent job:
- Click None to unassign the parent job.
- Click By Job ID and specify the ID of the parent job.
- Click From Job List and choose a parent job from the list.
- Type a detailed description for the job in the Description text box if necessary.
- Click Apply to save the changes.
Modify dates
The Dates section lists the project dates associated with the job. The scheduled dates represent the target project dates, while the actual start and completion dates represent the dates the job started and completed once the job is executed. All dates are editable properties on the Descriptive Information tab.
- Click the Date control under Scheduled Start Date to change the project's start date.
- Click the Date control under Scheduled Due Date to change the project's due date.
- Click Apply to save the changes.
Modify spatial data
The Spatial Data section lists the data workspace from which spatial data for the job will be retrieved, as well as the active version of that data for the job and the parent version of the job version. The parent version is the parent for the job version. Any version can serve as a parent version, including the default or any other version that is appropriate for the organization. The job version is a child of the parent version. Spatial edits for a job are made in the job version. You can select any existing version from the Manage Version dialog box or choose to create a public version. These are all editable properties.
- Click the browse button next to Data Workspace to display a list of data workspaces configured in the system.
- Choose the workspace from the list on the Select Workspace dialog box and click OK.
The default version designated for this geodatabase is automatically displayed.
- Click the browse button next to Parent Version to choose the target parent version of the data for this job.
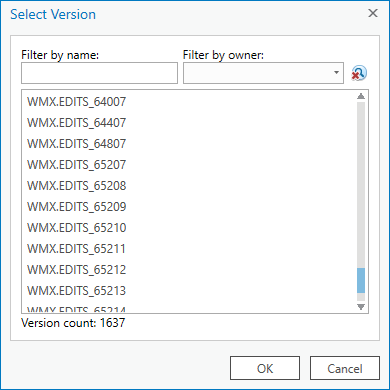
The Select Version dialog box appears with a list of versions. They can be filtered by name and owner of the version.
Remarque :
For a feature service data workspace, the parent version can only be sde.Default and the browse button is disabled.
- Choose a version.
- Cliquez sur OK.
- Click the browse button next to Version.
The Manage Version dialog box appears.
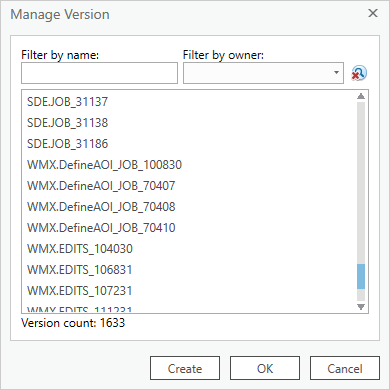
- Choose an existing version on the Manage Version dialog box and click OK.
The job version is selected. The parent version is updated based on the selected version. If the selected version is from a feature service, the parent version is not applied.
- You can also create a new job version from the parent version you chose in step 4.
- Click Create.
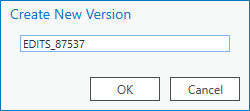
The Create New Version dialog box appears. The name of the version is based on the naming scheme defined in the job template.
Remarque :
If a job's spatial data comes from a feature service data workspace, a branch version can be created as the job version.
- Specify the name of the job version.
- Click OK.
Remarque :
For more information about versioning, see Overview of versioning.
- Click Create.
- Click Apply to save the changes.
Vous avez un commentaire à formuler concernant cette rubrique ?