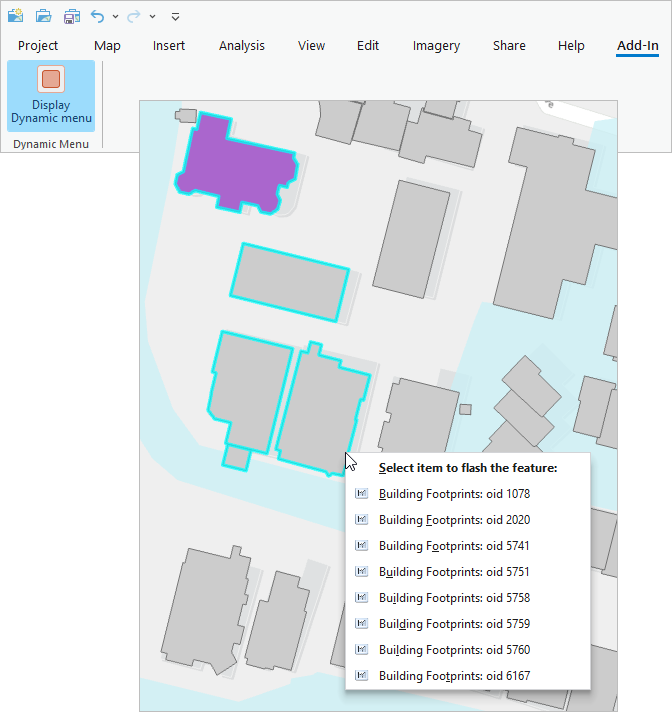
An add-in is custom functionality created by developers or users with the ArcGIS Pro SDK 3.2 for .NET. Add-ins integrate seamlessly with ArcGIS Pro. In many cases, add-ins customize the user interface, providing a new tool or set of tools that appears on the Add-In ribbon tab, other tabs, or other areas of the application such as custom panes.
Note:
ArcGIS Pro 3.0 and later releases will only load add-ins that have been compiled with ArcGIS Pro SDK 3.0 and later versions. See ProConcepts 3.0 Migration Guide for more information.

An add-in is packaged as a single compressed file with the .esriAddInX extension. This is a simple file type that can be sent by email, downloaded from a portal, or exchanged in the same ways as other ordinary files.
Add-ins can be installed to a default local folder with an installation utility or loaded from a folder designated as a well-known folder. Both methods are described in the sections below. Add-ins are viewed and deleted from the Add-In Manager on the ArcGIS Pro Settings page.
Add-ins provide unique functionality but may also introduce security risks or lead to unstable software behavior. It is important to know and trust the source of an add-in.
To create your own add-ins, you need the ArcGIS Pro SDK. The ArcGIS Developer site has tutorials to help you build your first add-in.
Install an add-in with the installation utility
When you install an add-in with the installation utility, the add-in is copied to this default location: %System Drive%\Users\<username>\Documents\ArcGIS\AddIns\ArcGISPro. Before copying the file, the utility ensures that a newer version of the add-in does not already exist in the location.
- Browse to the folder location of an add-in file (*.esriAddInX) on your computer or a network drive.
- Double-click the file to open the Esri ArcGIS Add-In Installation Utility window.
Review the information in the Esri ArcGIS Add-In Installation Utility window.
- To continue, click Install Add-In.
The add-in is copied to the default location and installed. A copy of the file remains in the location where you browsed to it.
- If ArcGIS Pro is open, exit and restart the application.
The add-in is now available for use.
Note:
If the add-in was written for a 2.x version of ArcGIS Pro, a warning prompt appears. If you proceed with the installation, the add-in is copied to the default location but does not load.
Load an add-in from a well-known folder
You can designate a local or network folder as a well-known location for add-ins. On startup, ArcGIS Pro will check this folder and automatically load any add-ins that it finds there.
Designating a well-known folder on a network drive is a convenient way for many people in a workplace to use the same add-ins. However, it may cause ArcGIS Pro to start more slowly. If you use a network folder, it is recommended that you use a subfolder of the root folder and that this subfolder contain only add-in files.
- Open the ArcGIS Pro settings page in one of the following ways:
- From an open project, click the Project tab on the ribbon.
- From the start page, click the Settings tab
 .
.
- In the list of side tabs, click Add-In Manager.
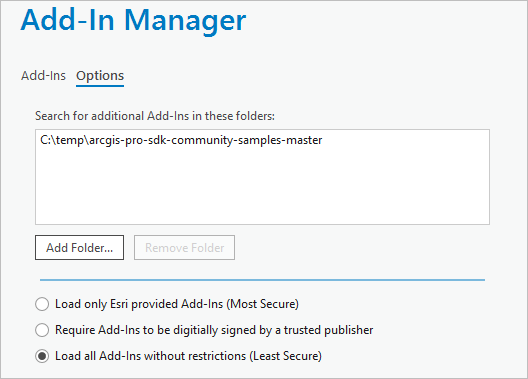
- In the Add-In Manager, click Options.
- On the Options tab, click Add Folder.
- On the browse dialog box, browse to the folder that you want to designate as a well-known folder.
- Click the folder to select it. Click OK.

The full path to the folder appears in the list of well-known folders.
Note:
By default, the option is selected to load all add-ins that are found in the well-known folder. You can choose a different option if you want to load only add-ins provided by Esri or only those digitally signed by a trusted publisher.
- Exit ArcGIS Pro.
- Use File Explorer to copy one or more .esriAddInX files into the well-known folder in its location on disk.
- Start ArcGIS Pro.
Add-ins in the well-known folder are loaded. The folder is checked for newly added or deleted add-ins each time you start ArcGIS Pro.
Tip:
To stop using a well-known folder, click the folder in the list of well-known folders and click Remove Folder. Restart ArcGIS Pro.
View add-ins
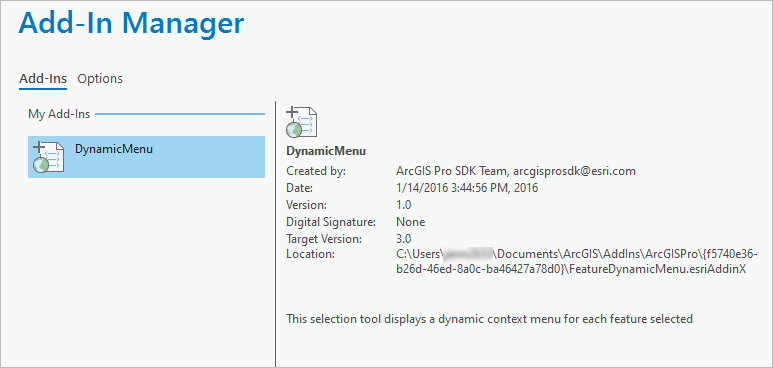
You can see your available add-ins in the Add-In Manager.
- Open the ArcGIS Pro settings page in one of the following ways:
- From an open project, click the Project tab on the ribbon.
- From the start page, click the Settings tab
 .
.
- In the list of side tabs, click Add-In Manager.
- In the Add-In Manager, on the Add-Ins tab, click an add-in to view information about it.

Delete an add-in
If you no longer need an add-in, you can delete it. Deleting an installed add-in uninstalls it from ArcGIS Pro and moves the .esriAddInX file to the system recycle bin.
Caution:
If you use the Add-In Manager to delete an add-in that is loaded from a well-known folder on a network drive, the .esriAddInX file is permanently deleted, just as it would be if you used File Explorer to delete the file from its location on disk.
- Open the Add-In Manager and select an add-in as described in the View add-ins section above.
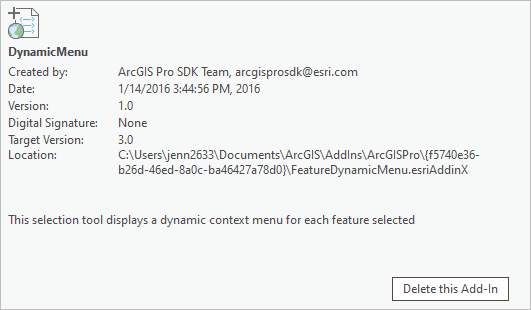
- Click Delete this Add-In.

The add-in is marked for deletion but remains available in your current ArcGIS Pro session.

- Exit and restart ArcGIS Pro.
The add-in is uninstalled and removed from the Add-In Manager.
Note:
You cannot delete any add-ins that appear under the Shared Add-Ins heading of the Add-In Manager because they are managed by your software administrator. For more information, see the Make administrative settings section below.
Disable add-ins
If ArcGIS Pro behaves in unexpected ways or stops working after you install add-ins, you can disable add-ins by starting ArcGIS Pro from the Windows command prompt with a special parameter. If the software behaves normally when add-ins are disabled, you may need to delete one or more add-ins.
To disable add-ins, start ArcGIS Pro from the command line with the following command:
"%ProgramFiles%\ArcGIS\Pro\bin\ArcGISPro.exe" /disableaddins
No add-ins appear in the Add-In Manager. To reenable add-ins, exit and restart ArcGIS Pro normally.
Make administrative settings
As a software administrator, you can make registry edits to block user access to add-ins, designate well-known folders, and set security levels for add-ins.
In the Windows Registry Editor, under HKEY_LOCAL_MACHINE > SOFTWARE > ESRI > ArcGISPro > Settings, create an Add-In Folders key and use string values to designate well-known folders. Add-in files placed in these folders will appear as shared add-ins in the Add-In Manager. For more information on making these registry edits, see ArcGIS Pro Registry Keys.