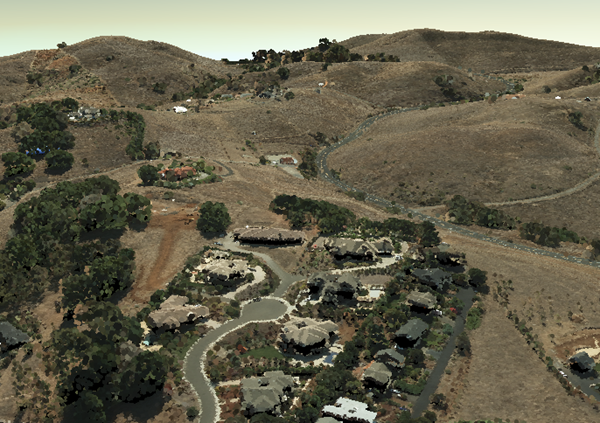
Point cloud scene layers provide fast display of large volumes of symbolized and filtered point cloud data. They are optimized for the display and sharing of many kinds of sensor data, including lidar. You can build point cloud scene layers directly from a LAS dataset layer, and they support sharing 3D point cloud content across the platform. LAS, ZLAS and LAZ files are supported by a point cloud scene layer. You create point cloud scene layers by generating a scene layer package (.slpk) file on disk and publishing it as a scene service on ArcGIS Enterprise or ArcGIS Online. Optionally, you can preview the scene layer package as a layer directly in ArcGIS Pro.
A point cloud scene layer is created using the Create Point Cloud Scene Layer Package geoprocessing tool. A point cloud scene layer supports point cloud data in LAS format and Optimized LAS (.ZLAS) format, which is referenced by a LAS dataset. You can also use individual files and folders of LAS, ZLAS and LAZ files as input to the Create Point Cloud Scene Layer Package tool. Symbology and point filtering that has been applied to the points of a LAS dataset layer will be used to create the point cloud scene layer. The default elevation symbology and no point filtering will be used to create a point cloud scene layer when individual files or a folder of files is used as input to the tool.
Create separate point cloud scene layers if the extent of the scene layer includes areas where no point data exists. For example, it is not recommended that you build a point cloud scene layer with data from each coast of North America; it is better to separate these datasets out into their own point cloud scene layers for the sake of performance.

Visualization
You can find visualization and display control for a point cloud scene layer on the Appearance tab. To access the Appearance tab, select a point cloud scene layer in the Contents pane, and click the Appearance tab. Set the minimum and maximum visibility range to use for the point cloud scene layer. Drag the swipe tool to reveal layers beneath the chosen point cloud scene layer.
When a point cloud scene layer is added to ArcGIS Pro, the points are drawn with an elevation renderer and eye-dome lighting applied, by default. Eye-dome lighting is a shading technique that improves the perception of depth and contour when viewing LAS datasets. To turn eye-dome lighting on or off, select a point cloud scene layer in the Contents pane, select the Appearance contextual tab and locate the Lighting and Shading group, and select the Eye-Dome Lighting button.
Snapping is used to help edit geographic data in ArcGIS Pro. When snapping is enabled you can select a point from a point cloud scene layer to use during your edit session.
Pop-ups
A point cloud scene layer is only supported in the 3D Layers category of a scene. When displaying a point cloud scene layer in a scene, you can
quickly view attribute information about a particular point using the Explore tool  .
The default pop-up window displays a formatted list of
attributes when a point is selected in a scene view. For more information on pop-ups, see Pop-ups.
Point thinning and scalability
Point cloud scene layers are scalable, allowing you to work with large point cloud datasets efficiently. Rendering very large point sets is generally slow, partially due to hardware limitations. Point cloud scene layers are efficient in that the areas you need to visualize are rendered at an optimized point resolution. Display Limit and Density allow you to control how many points are rendered.
Follow these steps to access these settings:
- Select a point cloud scene layer in the Contents pane.
- On the Appearance tab, in the Point Display group, choose the applicable point thinning options for the selected point cloud scene layer.
Display Limit
Applying a Display Limit sets a size limit to the number of points used to display the point cloud scene layer. The default value is 1,000,000. If, for a given display extent, a point cloud scene layer exceeds the specified point count, the layer switches to be more generalized.
Density
This setting controls the density of points enforced by the point cloud scene layer. You set it interactively using the slider bar. Move the slider to the left toward Min for a coarse point resolution and to the right toward Max for a finer resolution. As you move the slider bar, the density of the points on-screen automatically changes and updates.
Working with geoprocessing tools
A point cloud scene layer is not supported as input to any geoprocessing tools, except the Validate Scene Layer Package and Extract LAS tools.
Sharing
You can publish a point cloud scene layer as a service layer and upload it to ArcGIS Enterprise or ArcGIS Online using the Share Package geoprocessing tool. You can share a LAS dataset layer directly from ArcGIS Pro as point cloud scene layer to ArcGIS Enterprise or ArcGIS Online when caching locally.